Building a Collection For SwiftUI (Part 2) - SwiftUI Collection Implementation
14 September 2020Faced with the inability to reach an acceptable level of performance with grid layouts made of simple SwiftUI building blocks, I decided to roll my own solution.
This article is part 2 in the Building a Collection For SwiftUI series.
- Implementation Strategies and Requirements
- Wrapping UIKit Collection View Into SwiftUI
- Providing a Collection View Layout
- Loading Data Into the Collection
- Data Source and Coordinator
- Data Source Snapshots
- Solving Performance Issues
- Collection Layout Support
- Cell Layout
- Cell Display
- Example of a Grid Layout
- Wrapping Up
Implementation Strategies and Requirements
Two possible implementation strategies can be considered when implementing a SwiftUI collection:
- Reproducing
UICollectionViewentirely in SwiftUI, including cell reuse and decoration views, not to mention flexible layout support. - Wrapping
UICollectionViewinto a SwifUIUIViewRepresentable.
Since UICollectionView is already mature and has been greatly enhanced lately, the second option is obviously more manageable.
I added a few implementation constraints to ensure the custom collection view feels like a native SwiftUI component:
- It must nicely integrate with SwiftUI declarative formalism.
- Cells and supplementary views must be built in SwiftUI, not in UIKit, and certainly not with xibs or constraint-based layouts.
- Cells and supplementary views must be lazily instantiated and reused. Put another way, scrolling performance must be similar to what is usually expected from a
UICollectionView. - The collection view must support arbitrary layouts and nicely update when SwiftUI detects a change to a source of truth.
- Focus must be correctly managed on tvOS, in particular it should be possible to implement the standard user experience expected on Apple TV according to the Human Interface Guidelines.
Let us start by wrapping a UIKit collection into a SwiftUI view.
Wrapping UIKit Collection View Into SwiftUI
A great feature of SwiftUI is the ease with which you can embed UIKit views in SwiftUI and conversely. This makes it easy to adopt SwiftUI where you can in your app, while still using good old UIKit where SwiftUI is lagging behind in functionality or performance.
SwiftUI provides the UIViewRepresentable protocol to wrap a UIKit view for use in SwiftUI. We can also wrap a view controller into a UIViewControllerRepresentable, but I here prefer the former approach as there is here no real competitive advantage in wrapping UICollectionViewController instead of UICollectionView directly.
If you are not familiar with SwiftUI, just recall that a View in SwiftUI can be seen as a short-lived layout snapshot, unlike a UIView in UIKit which is actually what is drawn on screen. To create and update content on screen in SwiftUI you therefore provide an up-to-date snapshot of your layout which then gets applied by the SwiftUI layout engine depending on what has changed. Snapshots are then discarded until new ones are required by further updates.
When interfacing UIKit with SwiftUI this important distiction translates into two protocol methods required by UIViewRepresentable, so that View snapshots can create or update the matching UIView on screen:
makeUIView(context:)is called when theUIViewdescribed by aViewneeds to be created.updateUIView(_:context:)is called when the availableUIViewdescribed by aViewneeds to be updated.
We therefore start our implementation by conforming our new CollectionView type to UIViewRepresentable and implementing its two required methods:
struct CollectionView: UIViewRepresentable {
    func makeUIView(context: Context) -> UICollectionView {
        // Create the collection view for the first time
    }

    func updateUIView(_ uiView: UICollectionView, context: Context) {
        // Update the existing collection view
    }
}
In our case the actual UICollectionView instance must be created in makeUIView(context:), but this requires a collection view layout to be provided at initialization time first.
Providing a Collection View Layout
With iOS 13 and tvOS 13 collection view layouts can be provided in a general declarative way through compositional layouts. The obtained layout code is expressive and supports advanced features like independently scrollable sections.
Because SwiftUI was introduced with iOS and tvOS 13, compositional layouts are the obvious choice for our implementation:
struct CollectionView: UIViewRepresentable {
    private func layout() -> UICollectionViewLayout {
        return UICollectionViewCompositionalLayout { sectionIndex, layoutEnvironment in
            // Return section layout
        }
    }

    func makeUIView(context: Context) -> UICollectionView {
        return UICollectionView(frame: .zero, collectionViewLayout: layout())
    }

    func updateUIView(_ uiView: UICollectionView, context: Context) {
        // Update the existing collection view
    }
}
Note that we provide .zero as frame since SwiftUI is responsible of applying a suitable frame when the UICollectionView is actually drawn on screen.
Compositional layouts are defined using sections, each section containing groups of items with supplementary or decoration views, and possibly independent orthogonal scrolling behavior. How and where this layout definition should be provided is yet still unclear, we just know it must ultimately be delivered by a layout() method.
Before we proceed with finding how to actually provide section layout definitions, let us first discuss how data will be loaded into the collection.
Loading Data Into the Collection
Since iOS 13 and tvOS 13, and in addition to compositional layouts, UIKit provides diffable data sources to incrementally update data associated with a collection and animate changes. Such data sources ensure that cells and underlying data stay consistent, avoiding crashes ususally associated with mismatches between data and layout.
When a data change needs to be made, a corresponding snapshot must be created and applied to the data source, which then takes care of the updating the associated collection view. This approach is quite similar to how SwiftUI reacts to data changes in general: When a change is detected a new layout description is provided to represent the new state and SwiftUI takes care of applying it to update the content visible on screen. Diffable data sources therefore seem quite appropriate in achieving what we need.
Let us first briefly consider from a client perspective. A parent content view which displays some Model conforming to ObservableObject into our CollectionView would roughly be implemented as follows:
struct ContentView: View {
    @ObservedObject var model: Model

    private func data(from model: Model) -> CollectionData {
        // Build data as expected by the CollectionView
    }

    var body: some View {
        CollectionView(data: data(from: model))
    }
}
When a model update is published by the observed object the view body is recalculated. An internal method takes care of creating a new data snapshot in some format understood by the CollectionView, yet to be determined. The SwiftUI layout engine then either creates or updates the underlying UICollectionView using this new view snapshot.
What kind of data format should we use, then? Using UICollectionViewDiffableDataSource internally is appropriate for the reasons outlined above. Since this type is generic and parametrized with two types, SectionIdentifierType and ItemIdentifierType (both required to be Hashable), our CollectionView type needs to be generic as well.
For compatibility with compositional layouts which display rows of items, it is natural to model the data displayed by a CollectionView as an array of rows, each row being described by the section it corresponds to and the items it contains:
struct CollectionRow<Section: Hashable, Item: Hashable>: Hashable {
    let section: Section
    let items: [Item]
}
Since Section and Item are both Hashable, making CollectionViewRow itself hashable only requires an explicit protocol conformance. Having a row itself hashable is useful to quickly check whether it changed, but more on that later.
Since CollectionRow is a generic type, the collection view itself must at least be parametrized with the same Section and Item types:
struct CollectionView<Section: Hashable, Item: Hashable>: UIViewRepresentable {
    let rows: [CollectionRow<Section, Item>]

    // ...
}
Types for the generic parameters will be automatically inferred by the Swift compiler when assigning rows to the collection. Still these rows are received by CollectionView and must be represented by a UICollectionView. Now is therefore the time to actually implement the diffable data source we need.
Data Source and Coordinator
A UICollectionView requires a data source to provide the data it displays. Instantiating a diffable data source containing Items in Sections and displaying them in a collectionView is simple:
let dataSource = UICollectionViewDiffableDataSource<Section, Item>(collectionView: collectionView) { collectionView, indexPath, item in
    // Return UICollectionViewCell for the item
}
This data source must be retained, as the collection view only keeps a weak reference to it. But where should we store a strong reference to the data source to keep it alive, since Views in SwiftUI are merely short-lived snapshots which get destroyed once they have been applied?
Fortunately SwiftUI provides an answer in the form of coordinators. The UIViewRepresentable protocol namely lets you optionally implement a makeCoordinator() method, from which you can return an instance of a custom type. SwiftUI calls this method before creating the UIKit view from the first time, associates the coordinator with it, and keeps the coordinator alive for as long as the UIView is in use.
We don’t know much about the coordinator type we need yet, except that it must store our data source. After initial creation, this coordinator is provided to the makeUIView(context:) method through the context parameter as a constant. We must be able to mutate the contained data source reference after the UICollectionView has been instantiated (the diffable data source namely requires the collection view at initialization time), so our Coordinator needs to be a class:
struct CollectionView<Section: Hashable, Item: Hashable>: UIViewRepresentable {
    class Coordinator {
        fileprivate typealias DataSource = UICollectionViewDiffableDataSource<Section, Item>

        fileprivate var dataSource: DataSource? = nil
    }

    // ...

    func makeCoordinator() -> Coordinator {
        return Coordinator()
    }

    func makeUIView(context: Context) -> UICollectionView {
        let collectionView = UICollectionView(frame: .zero, collectionViewLayout: layout())
        context.coordinator.dataSource = Coordinator.DataSource(collectionView: collectionView) { collectionView, indexPath, item in
            // Return UICollectionViewCell for the item
        }
        return collectionView
    }
}
Now that we have a data source properly created and retained for the lifetime of the collection view, we can discuss how to fill it with data.
Data Source Snapshots
Updating a diffable data source is made in increments. When data changes it suffices to build a new data snapshot and apply it:
struct CollectionView<Section: Hashable, Item: Hashable>: UIViewRepresentable {
    // ...

    private func snapshot() -> NSDiffableDataSourceSnapshot<Section, Item> {
        var snapshot = NSDiffableDataSourceSnapshot<Section, Item>()
        for row in rows {
            snapshot.appendSections([row.section])
            snapshot.appendItems(row.items, toSection: row.section)
        }
        return snapshot
    }

    func updateUIView(_ uiView: UICollectionView, context: Context) {
        guard let dataSource = context.coordinator.dataSource else { return }
        dataSource.apply(snapshot(), animatingDifferences: true)
    }
}
There are two performance issues associated with the above code, though:
- The first animated applied snapshot can be slow for a large amount of data.
- If you run this code on tvOS for a large number of row items and try to navigate the collection, you will discover that performance is really poor. If you try the same code on iOS performance is much better, though.
Since performance issues are what motivated the creation of a custom CollectionView in the first place, we must fix these identified problems before going any further.
Solving Performance Issues
To fix performance issues associated with the first snapshot, it suffices to factor out the corresponding code into a reloadData(context:animated:) method, called with or without animation depending on whether we are creating or updating the view:
struct CollectionView<Section: Hashable, Item: Hashable, Cell: View>: UIViewRepresentable {
    // ...

    private func reloadData(context: Context, animated: Bool = false) {
        guard let dataSource = context.coordinator.dataSource else { return }
        dataSource.apply(snapshot(), animatingDifferences: animated)
    }

    func makeUIView(context: Context) -> UICollectionView {
        let collectionView = UICollectionView(frame: .zero, collectionViewLayout: layout())

        context.coordinator.dataSource = Coordinator.DataSource(collectionView: collectionView) { collectionView, indexPath, item in
            // Return UICollectionViewCell for the item
        }

        reloadData(context: context)
        return collectionView
    }

    func updateUIView(_ uiView: UICollectionView, context: Context) {
        reloadData(context: context, animated: true)
    }
}
The second performance problem we are facing on tvOS is due to snapshots being applied too many times. Recall that SwiftUI recalculates view bodies when a source of truth changes. Many kinds of changes can therefore trigger updateUIView(_:context:), which is why you should attempt to keep its implementation as lightweight as possible in general.
In particular @Environment changes trigger a view update. A specificity of tvOS is that focus updates are provided through the environment. Moving the focus around is therefore sufficient to trigger view updates with each and every move. This is the reason why navigating the collection is a lot heavier on tvOS than on iOS with the implementation above, as snaphots are applied every time the focus is moved.
Sadly there is no way to distinguish updates due to data or enviroment changes in updateUIView(_:context:). The context does not provide this kind of information, the implementation therefore has no way to know whether an update requires a snapshot to be applied (data change) or not (simple environment change). Is there a way to avoid applying snaphots when the data has not changed?
Fortunately there is. As you may remember we made CollectionViewRow conform to Hashable. Calculating hashes is much cheaper than creating and applying a snapshot. Each time we apply a snapshot we can therefore store a hash of its rows, persist this value into our coordinator so that it stays available between updates, and only apply a new snapshot when the hash actually changed:
struct CollectionView<Section: Hashable, Item: Hashable>: UIViewRepresentable {
    class Coordinator {
        // ...

        fileprivate var rowsHash: Int? = nil
    }

    // ...

    private func reloadData(context: Context, animated: Bool = false) {
        let coordinator = context.coordinator
        guard let dataSource = coordinator.dataSource else { return }

        let rowsHash = rows.hashValue
        if coordinator.rowsHash != rowsHash {
            dataSource.apply(snapshot(), animatingDifferences: animated)
            coordinator.rowsHash = rowsHash
        }
    }
}
With this simple trick performance problems on tvOS are eliminated, even with large data sets containing thousands of items. Note that though this CollectionView implementation inhibits reloads due to environment changes, subviews (e.g. cells we will discuss below) can still individually respond to environment changes if they need to.
We now almost have a first working CollectionView implementation. We only need to be able to configure its layout and cells when creating it.
Collection Layout Support
At the beginning of this article we instantiated a UICollectionViewCompositionalLayout but did not provide any meaningful implementation for it:
struct CollectionView<Section: Hashable, Item: Hashable>: UIViewRepresentable {
    // ...

    private func layout() -> UICollectionViewLayout {
        return UICollectionViewCompositionalLayout { sectionIndex, layoutEnvironment in
            // Return section layout
        }
    }
}
How should clients of our CollectionView provide a layout? We want our collection to behave as a native SwiftUI component, it would therefore be tempting to use function builders to have a SwiftUI-inspired syntax for layout construction too. But since the current compositional layout API is already declarative and simple, I think it is simpler to just use it as is, rather than introducing a new syntax and the code to support it.
Our compositional layout internally requires a section layout provider trailing closure, so this is what our public type interface will let the user customize:
struct CollectionView<Section: Hashable, Item: Hashable>: UIViewRepresentable {
    // ...

    let rows: [CollectionRow<Section, Item>]
    let sectionLayoutProvider: (Int, NSCollectionLayoutEnvironment) -> NSCollectionLayoutSection

    private func layout() -> UICollectionViewLayout {
        return UICollectionViewCompositionalLayout { sectionIndex, layoutEnvironment in
            return sectionLayoutProvider(sectionIndex, layoutEnvironment)
        }
    }
}
Clients provide a section layout when instantiating a CollectionView, for example a shelf-like layout similar to the one we previously implemented with SwiftUI stacks and scroll views (see part 1):
CollectionView(rows: rows()) { sectionIndex, layoutEnvironment in
    let itemSize = NSCollectionLayoutSize(widthDimension: .fractionalWidth(1), heightDimension: .fractionalHeight(1))
    let item = NSCollectionLayoutItem(layoutSize: itemSize)

    let groupSize = NSCollectionLayoutSize(widthDimension: .absolute(320), heightDimension: .absolute(180))
    let group = NSCollectionLayoutGroup.horizontal(layoutSize: groupSize, subitems: [item])

    let section = NSCollectionLayoutSection(group: group)
    section.orthogonalScrollingBehavior = .continuous
    return section
}
Refer to the official documentation for more information about the compositional layout API. Note that how rows() are actually provided is here omitted for simplicity, as it does not affect the layout.
The layout example above is quite simple. In general each section layout might depend on the data model, though, for example if the layout is received from a web service. In such cases the sectionLayoutProvider block will capture the initial context and keep it for subsequent layout updates, which is not what we want if the layout returned by the web service later changes. To solve this issue our friend the coordinator again comes to the rescue:
struct CollectionView<Section: Hashable, Item: Hashable>: UIViewRepresentable {
    class Coordinator {
        // ...

        fileprivate var sectionLayoutProvider: ((Int, NSCollectionLayoutEnvironment) -> NSCollectionLayoutSection)?
    }

    let rows: [CollectionRow<Section, Item>]
    let sectionLayoutProvider: (Int, NSCollectionLayoutEnvironment) -> NSCollectionLayoutSection

    private func layout(context: Context) -> UICollectionViewLayout {
        return UICollectionViewCompositionalLayout { sectionIndex, layoutEnvironment in
            return context.coordinator.sectionLayoutProvider!(sectionIndex, layoutEnvironment)
        }
    }

    private func reloadData(context: Context, animated: Bool = false) {
        let coordinator = context.coordinator
        coordinator.sectionLayoutProvider = self.sectionLayoutProvider

        guard let dataSource = coordinator.dataSource else { return }

        let rowsHash = rows.hashValue
        if coordinator.rowsHash != rowsHash {
            dataSource.apply(snapshot(), animatingDifferences: animated)
            coordinator.rowsHash = rowsHash
        }
    }

    // ...

    func updateUIView(_ uiView: UICollectionView, context: Context) {
        reloadData(context: context, animated: true)
    }
}
This way we ensure the section layout provider is kept up-to-date between view updates so that the layout is always the most recent one, especially if it depends on the data model. Note that the optional sectionLayoutProvider stored by the Coordinator can here be safely force unwrapped, as it will always be available by construction. Note we also updated the layout(context:) method with a Context parameter to retrieve the coordinator from.
With layout definition needs covered let us finish by discussing cell layout and display.
Cell Layout
Our CollectionView first implementation is almost finished, but the cell provider closure of our UICollectionViewDiffableDataSource is still missing. Recall that we don’t want to layout cells with UIKit code but with SwiftUI declarative syntax. How should we now proceed?
SwiftUI syntax is built on top of view builders, actually a special kind of function builder. To be able to associate SwiftUI cells with their UICollectionViewCell counterparts (which we still need internally for our UICollectionView implementation), we simply introduce a view builder taking an index path and item as parameters, and returning some SwiftUI view as cell:
struct CollectionView<Section: Hashable, Item: Hashable, Cell: View>: UIViewRepresentable {
    // ...

    let rows: [CollectionRow<Section, Item>]
    let sectionLayoutProvider: (Int, NSCollectionLayoutEnvironment) -> NSCollectionLayoutSection
    let cell: (IndexPath, Item) -> Cell

    init(rows: [CollectionRow<Section, Item>],
         sectionLayoutProvider: @escaping (Int, NSCollectionLayoutEnvironment) -> NSCollectionLayoutSection,
         @ViewBuilder cell: @escaping (IndexPath, Item) -> Cell) {
        self.rows = rows
        self.sectionLayoutProvider = sectionLayoutProvider
        self.cell = cell
    }
}
The @ViewBuilder syntax requires a dedicated initializer, as @ViewBuilder can only appear as a parameter-attribute. Note that Swift infers the type of the cell body based on the view builder block, forcing us to add Cell as additional parameter of the CollectionView generic type list.
Cell Display
Cells whose layout is defined with SwiftUI code are ultimately displayed by a UICollectionView and thus must be wrapped for display by UIKit. This is achieved by using UIHostingController and a simple host UICollectionViewCell:
struct CollectionView<Section: Hashable, Item: Hashable, Cell: View>: UIViewRepresentable {
    // ...

    private class HostCell: UICollectionViewCell {
        private var hostController: UIHostingController<Cell>?

        override func prepareForReuse() {
            if let hostView = hostController?.view {
                hostView.removeFromSuperview()
            }
            hostController = nil
        }

        var hostedCell: Cell? {
            willSet {
                guard let view = newValue else { return }
                hostController = UIHostingController(rootView: view)
                if let hostView = hostController?.view {
                    hostView.frame = contentView.bounds
                    hostView.autoresizingMask = [.flexibleWidth, .flexibleHeight]
                    contentView.addSubview(hostView)
                }
            }
        }
    }
}
The implementation of this cell is straightforward:
- We prepare a
UIHostingControllerwhen setting a SwiftUI cell. The hosting controller view is installed to fill the entire cell content view. Such embedding is actually made possible by the fact that creating aUIHostingControlleris actually quite cheap. - When a cell is reused, the hosting controller view is removed and the controller itself is released.
Now that we have a cell, it suffices to register it and return dequeued instances from our data source, assigning it the corresponding SwiftUI cell:
struct CollectionView<Section: Hashable, Item: Hashable>: UIViewRepresentable {
    // ...

    func makeUIView(context: Context) -> UICollectionView {
        let cellIdentifier = "hostCell"

        let collectionView = UICollectionView(frame: .zero, collectionViewLayout: layout(context: context))
        collectionView.register(HostCell.self, forCellWithReuseIdentifier: cellIdentifier)

        context.coordinator.dataSource = Coordinator.DataSource(collectionView: collectionView) { collectionView, indexPath, item in
            let hostCell = collectionView.dequeueReusableCell(withReuseIdentifier: cellIdentifier, for: indexPath) as? HostCell
            hostCell?.hostedCell = cell(indexPath, item)
            return hostCell
        }

        reloadData(context: context)
        return collectionView
    }
}
Note that, unlike cells defined in UIKit, there is no need for clients of our CollectionView to mess with cell class registrations and reuse identifiers. Only one cell identifier is required and managed internally. All cells provided in SwiftUI namely share the same Cell generic type parameter, whose actual value is filled in by the Swift compiler based on what is inside the view builder closure.
Remark
iOS and tvOS 14 provide a new CellRegistration API but, to keep things simple, we still use the old cell registration and dequeuing API, so that the implementation is compatible with iOS and tvOS 13 without the use of availability macros. The iOS and tvOS 14 modern implementation is left as an exercise for the reader.
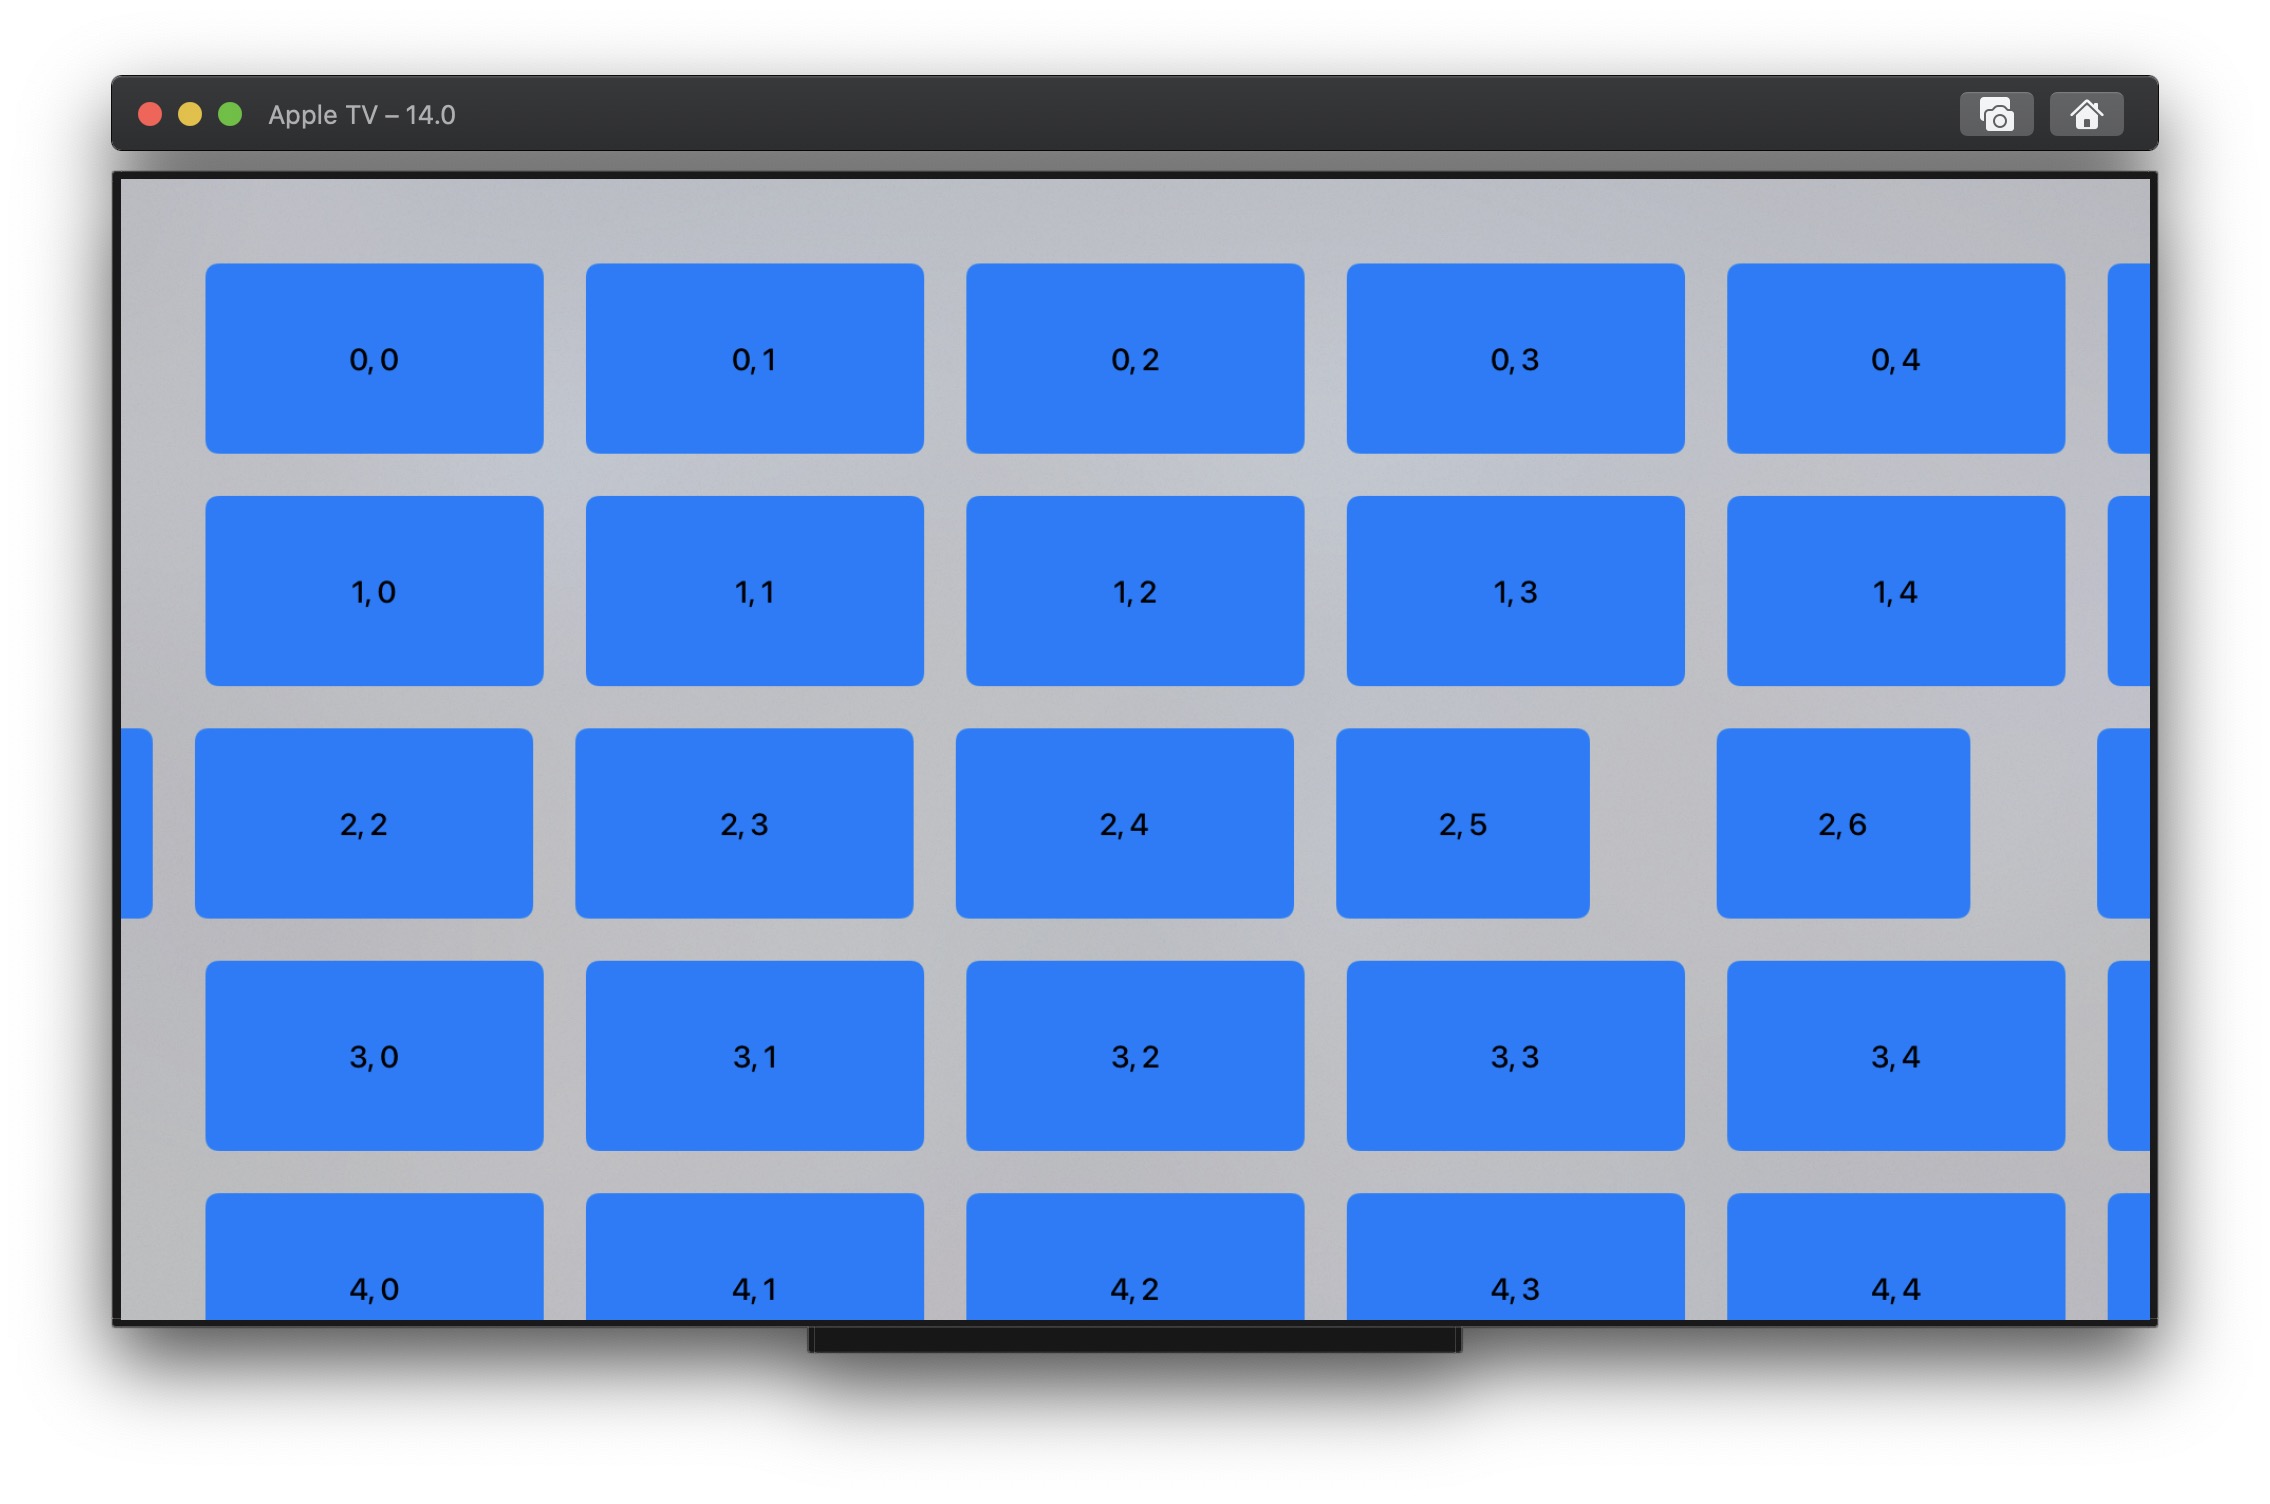
Example of a Grid Layout
Bringing everything together, we now have a first working implementation of a CollectionView in SwiftUI, powered by UICollectionView. The complete source code will be provided in the third and last article in this series, but let us have a look at how a shelf-like layout like the one we discussed in part 1 is implemented with the API we have defined throughout this article, on tvOS:
import SwiftUI

struct Shelf: View {
    typealias Row = CollectionRow<Int, String>

    var rows: [Row] = {
        var rows = [Row]()
        for i in 0..<20 {
            rows.append(Row(section: i, items: (0..<10).map { "\(i), \($0)" }))
        }
        return rows
    }()

    var body: some View {
        CollectionView(rows: rows) { sectionIndex, layoutEnvironment in
            let itemSize = NSCollectionLayoutSize(widthDimension: .fractionalWidth(1), heightDimension: .fractionalHeight(1))
            let item = NSCollectionLayoutItem(layoutSize: itemSize)

            let groupSize = NSCollectionLayoutSize(widthDimension: .absolute(320), heightDimension: .absolute(180))
            let group = NSCollectionLayoutGroup.horizontal(layoutSize: groupSize, subitems: [item])

            let section = NSCollectionLayoutSection(group: group)
            section.contentInsets = NSDirectionalEdgeInsets(top: 20, leading: 0, bottom: 20, trailing: 0)
            section.interGroupSpacing = 40
            section.orthogonalScrollingBehavior = .continuous
            return section
        } cell: { indexPath, item in
            GeometryReader { geometry in
                Button(action: {}) {
                    Text(item)
                        .frame(width: geometry.size.width, height: geometry.size.height)
                        .background(Color.blue)
                }
                .buttonStyle(CardButtonStyle())
            }
        }
        .frame(maxWidth: .infinity, maxHeight: .infinity)
        .ignoresSafeArea(.all)
    }
}
The formalism is quite elegant and compact but, when actually running the code above, we find a few more issues:
- When scrolling a shelf horizontally, cells which appear from the edges are not properly sized.
- Buttons do not exhibit the
CardButtonStyleappearance when focused.
Wrapping Up
In this lengthy article we have implemented a working collection view for SwiftUI, based on UICollectionView. We have designed an API to layout the collection itself as well as its individual cells. We also have ensured performance is on par with what we expect from a usual UIKit collection view, thus addressing our initial problem.
The end result, while certainly promising, still suffers from a few issues we will solve in the next and final article in this series.
Read next: Part 3: Fixes and Focus Management